Wednesday, April 11, 2012
Time Out
So- for the very few people that read this from time to time- I am sure you have noticed I have been MIA...Lots of things going on- and the poor blog has fallen to the way side.....Since there are so many things going on- I am going to put the blog on hold for a while- in the next few months I will be moving, becoming a home owner, going back to school and leaving my beloved NYC(which I plan to continue to visit constantly) so until the water has settled a little I will be absent from the blog world! Hopefully one day I will return!!
Monday, March 12, 2012
Simply the Best Brussels Sprouts
So for most of my life brussels sprouts got a pretty bad rap.....and steamed brussles sprouts(aka the kind out parents grew up on) are pretty darn nasty! Luckily these little bites of heaven have made a big resurgence in the past year are so- and now they are everywhere! While you can prepare them SO many ways, and add all sorts of yummy things (Pancetta) to make the tasty- this is recipe yields a very simple, but intensely wonderful brussels sprout!

Ingredients:
Brussels Sprouts(I usually make about a skillet full)
1 1/2 tbsp butter
2 tbsp olive oil
salt
garlic salt
pepper
Directions:
-Preheat oven to 350
-So even though this recipe is for roasted brussels sprouts there is a step that involves the stove- and this is a crucial step- Clean your sprouts and cut them in half (make sure to remove any loose outer leaves and the entire stalk when cleaning)

-melt the butter in a skillet over medium heat and sprinkle some salt and garlic salt into the melted butter
-place the brussels flat side down into the skillet and sauté for about 5 minutes- while the are cooking coat the backs of the brussels with olive oil as well as salt and pepper-
-once the middles begin to brown slightly you can stir them around in the pan for a minute or two to coat the entire brussel in oil and seasoning.

-place the brussels flate side up(my picture us from before I turned them all over) on baking sheet and cook for about 15-20- shaking the pan and allowing them to turn at least once during the baking time!
This is so simple and easy- but the skillet portion of this recipe makes a big difference! This recipe makes the most tender and tasty brussels sprouts I have been able to produce at home- and I have gotten in the habit of eating this about 3 times a week! enjoy!
Roasted Brussles Sprouts:

Ingredients:
Brussels Sprouts(I usually make about a skillet full)
1 1/2 tbsp butter
2 tbsp olive oil
salt
garlic salt
pepper
Directions:
-Preheat oven to 350
-So even though this recipe is for roasted brussels sprouts there is a step that involves the stove- and this is a crucial step- Clean your sprouts and cut them in half (make sure to remove any loose outer leaves and the entire stalk when cleaning)

-melt the butter in a skillet over medium heat and sprinkle some salt and garlic salt into the melted butter
-place the brussels flat side down into the skillet and sauté for about 5 minutes- while the are cooking coat the backs of the brussels with olive oil as well as salt and pepper-
-once the middles begin to brown slightly you can stir them around in the pan for a minute or two to coat the entire brussel in oil and seasoning.

-place the brussels flate side up(my picture us from before I turned them all over) on baking sheet and cook for about 15-20- shaking the pan and allowing them to turn at least once during the baking time!
This is so simple and easy- but the skillet portion of this recipe makes a big difference! This recipe makes the most tender and tasty brussels sprouts I have been able to produce at home- and I have gotten in the habit of eating this about 3 times a week! enjoy!
Tuesday, February 28, 2012
Pinterest Tuesday: Golden Graham S'mores Bars
A few weekends ago we had a couple of visitors coming in- which officially put our stuffed apartment into the completely over capacity category. Since it was going to be a lot of people in a little space- I figured no better way to keep everyone happy than to supply ample snacking options! I found these on Pinterest and not only did they look delectable they also took about 12 minutes to make which was 3 minutes less than the time I actually had to dedicate to this project.


Golden Graham S'mores Bars

Ingredients:
1 bag mini marshmallows
1 package semi-sweet chocolate chips
5 tbsp butter(I only had 3 and it worked just fine!)
8 cups golden grahams cereal
1 tsp vanilla
Directions:
-Put the chocolate chips in the freezer while you prep the rest of the ingredients
-In a large pot melt the butter, once butter is melted add marshmallows and stir until marshmallows are melted then add the vanilla
-Remove from heat and add cereal and chocolate chips and stir until well combined
-Transfer to a greased dish and refrigerate for at least an hour before serving

So I know these are not super exciting or adventurous- but oh my were they good! Also as far as desserts go, these are pretty low cal- so that's always a plus- especially when four girls come home late one night and eat about 1/2 the pan! These were so good that I made the original batch Friday night- and on Sunday not only were we out but one of my roomies went and got the ingredients so that we could make more!
Thursday, February 23, 2012
Recipe Thursday!(Italian Style Beef with Polenta)
So I had a brief falling off the wagon with the blog so to speak- but I am back! This is a recipe I saw on another blog and thought it looked fantastic. It is from cooking light- so you can see the original recipe here! This also gave me the opportunity to finally break open the box to the my kitchen aid mixer meat grinder attachment(Thanks Rex). There is something kind of gross but also kind of awesome about grinding meat at home- it seems fresher- and I swear the fresh ground meat had more flavour than store bought- it was without a doubt a successful venture!


Italian Style Beef and Cheesy Polenta

Ingredients:
1 cup dry-coarse polenta
1 tsp dried oregano
Kosher salt
2 cups water
1 cup milk
3/4 cup grated parmigiana cheese
1 pound ground sirloin
1 cup chopped onion
1 tsp crushed red pepper
3 cloves minced garlic
2 cups marinara
Directions:
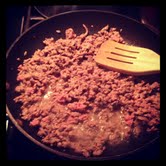
-So first off I cut up my sirloin steaks into 1/2 cubes and used my mixer to grind it up! I was surprised at how effectuation this little attachment is, super easy to use and almost all of the pieces are dishwasher safe!


-Once the meat was ground I seasoned it with salt, pepper, and a little Worcestershire- then I browned and drained the meat-

-Next I sautéed the onion,garlic, red pepper and salt in two tablespoons of olive oil for about 5 minutes or until the onions are soft.

-Once the onions were soft I added the beef and tomato sauce to the onion mixture and let it simmer until the rest of the meal was prepared(around 20 minutes) I used scarpetta brand tomato sauce and it was delicious!


-In typical NYC fashion I was not able to find the kind of polenta I really wanted and ended up getting frustrated and going with a semi instant box version I found at the Gourmet Garage- it turned out alright but I am not sure I would use it again- if the beef/sauce had not been so awesome I am not sure this would have been a successful venture.......
-I followed the direction on the box to cook the polenta, and added extra cheese, salt and dried oregano- It took a lot of whisking- but the cheese integrated well and added good flavour!

-So once the polenta was done, I spooned it onto a plate and covered it with a hearty helping to the beef/sauce mixture- served with brussels sprouts and a simple dinner roll this was a really great Friday night dinner, and everyone in the apartment seemed to enjoy it! I think this was also the night I finally mastered the art of roasting brussels sprouts- so that recipe is soon to follow!
Tuesday, January 31, 2012
Pinterest Tuesday: Amazing Lemon Cookies
So I am going out on a limb here, but I feel pretty confident that this is my best Pinterest find so far! My room-mates and I all LOVE lemon cookies so there were very high expectations set here- and these cleared the bar with room to spare!


Lemon Cookies with Lemon Glaze

Ingredients:
(cookies)
2 Cups all purpose flour
1/2 tsp baking soda
1/2 tsp salt
1 Tbsp finely grated lemon zest
2 Tbsp fresh lemon juice
1 stick butter(room temp)
1 Cup sugar
1 egg
1tsp vanilla extract
(Glaze)
2 Cups powdered sugar
2 Tbsp finely grated lemon zest
1/3 Cup fresh lemon juice
Directions:
-Preheat Oven to 350
-In medium bowl wish together flour, baking soda, salt and lemon zest

-In a separate bowl beat together egg and sugar until fluffy(about 4 minutes)- Add egg, vanilla, and lemon juice and beat until combined!

-On low speed beat the flour mixture into the egg/sugar mixture until thoroughly combined. Drop the dough onto a greased baking sheet by the spoonful and bake for 15-20 minutes(Mine were all the way done at the 14 minute mark, so keep an eye on them!) Edges will begin to brown which means they are ready!

-My cookies came out cooked to perfection but were not particularly uniform- So I took a round cookie cutter and cut perfect round cooked out of the middle!

-Once the cookies had cooled(and we had consumed all of the discarded edges) I mixed up the icing(all you have to do is whisk together the listed ingredients) and I put a hearty spoonful of icing over each cookie and let it set for about 30 minutes.

-These cookies were fantastic and would be great for a luncheon or bridal/baby shower! They are pretty and delicate- but OH so tasty! I also obviously have discovered the wonder that is instagram- so hopefully this will help my picture quality until I can get around to getting a proper camera!
Monday, January 30, 2012
The Lion
One on the best parts of going out to dinner in NYC is certain restaurants can make you feel 400x cooler than you really are- something about a hole in the wall restaurants with leather banquets, lit solely by candles and filled with beautiful people- creates a false sense of importance and glamour! Its fun, and should be enjoyed- I always love eating in restaurants that drum up this feeling! My most recent find in this category is my new #1 neighbourhood gem. The Lion- totally unassuming from the street this west village haunt feels like the perfect place to see and be seen!(so to speak)


Since I do not normally spend quite this much on myself for dinner any given week night- I decided we would take a client out to dinner here- score one for the home team! Not only did I get an amazing meal, but we looked super awesome to our client who was obviously impressed by the restaurant choice!(This is why I don't have pics-felt like it would be rude at a client dinner!)
I had perused the menu several times and ending up going with two of my all time fav foods- this can often be a disaster, because when you are eating a favourites you have high expectations. I was blown away, the food was artful and delicious! Top marks for both the tuna tartar as well as the gnocchi- this may be the best gnocchi I have ever had state side!
Since it was a work dinner we got there on the earlier side, and there was already a decent crowd- and once we finished dinner around 9 you could barely move about the room the bar was so packed! Nestled in a basement/garden setting you feel almost like you are in an old wine cellar with the brick walls and beautiful old wood floors. The décor is simple and elegant- confirming the food is the main focus and source of decoration in this spot.
Often times its hard to find a place that combines the palpably cool and trendy NYC scene with a truly wonderful culinary experience. The Lion succeeds on both fronts. I was thrilled with my experience and will undoubtedly be going back as soon as I can save up the $$!
The Lion
62 West 9th St
212-353-8400
Wednesday, January 25, 2012
Pinterest Tuesday: Lasagna Soup
So yes, it is Wednesday- but I did make this recipe in Tuesday so we are going to stick with the current naming convention! After the snow we had last weekend I was jonesing for some soup! The issue I most often have with soup is it can be seriously time consuming- so when I found this recipe and realized I could make it on a week night after work and still eat before 10 PM I was sold! I did tweak this recipe a touch just to accommodate some ingredients I already had- so while it was not super authentic- it was very good!!
 Ingredients:
2 tsp. olive oil
1-1/2 lbs. Italian sausage(I used Turkey Keilbasa- as I already had it)
3 c. chopped onions
4 garlic cloves, minced
2 tsp. dried oregano
1/2 tsp. crushed red pepper flakes
2 T. tomato paste
1 28-oz. can fire roasted diced tomatoes
2 bay leaves
6 c. chicken stock
8 oz. mafalda or fusilli pasta
1/2 c. finely chopped fresh basil leaves
salt and freshly ground black pepper, to taste


Lasagna Soup

2 tsp. olive oil
1-1/2 lbs. Italian sausage(I used Turkey Keilbasa- as I already had it)
3 c. chopped onions
4 garlic cloves, minced
2 tsp. dried oregano
1/2 tsp. crushed red pepper flakes
2 T. tomato paste
1 28-oz. can fire roasted diced tomatoes
2 bay leaves
6 c. chicken stock
8 oz. mafalda or fusilli pasta
1/2 c. finely chopped fresh basil leaves
salt and freshly ground black pepper, to taste
Cheese Amazingness:
2 c. shredded mozzarella (I used fresh b/c I had it- but I am sure bag would work fine!)
8 oz. ricotta
1/2 c. grated Parmesan cheese
1/4 tsp. salt
pinch of freshly ground pepper
1/2 c. grated Parmesan cheese
1/4 tsp. salt
pinch of freshly ground pepper
Directions:
-Heat olive oil in a large pot over medium heat. Add sausage(I cut mine up before adding it), breaking up into bite sized pieces, and brown for about 5 minutes. Add onions and cook until softened, about 6 minutes. Add garlic, oregano, and red pepper flakes. Cook for 1 minute. Add tomato paste(I ended up adding an extra half tbsp because I like the extra flavour!) and stir well to incorporate. Cook for 3 to 4 minutes, or until the tomato paste turns a rusty brown colour.
-Once it was all melded together I transferred it to a large stock pot(I do not consider it a successful cooking venture without making a giant mess in the sink!) Next: Add diced tomatoes, bay leaves, and chicken stock. Stir to combine. Bring to a boil and then reduce heat and simmer for 30 minutes.
-In the original recipe you add the pasta in the end and let it cook in the sauce for about 8 minutes- but I had made way more than we could eat and I did not want the noodles getting mushy sitting in the warm soup- so I cooked my noodles separately!
-While the noodles are cooking combine all of the cheese components and place a dollop in the bottom of each service bowl.

-Combine all of the ingredients and enjoy!


I felt like this recipe was a huge success! It felt like a much lighter way to enjoy an Italian FAV! I roasted some asparagus and shaved a little parmigiana and sprinkled a little balsamic on them and it was the perfect side! Since I cooked the noodles separately I just threw the soup in a container in the fridge and we can eat it again so easily later this week by just cooking up some fresh pasta! The whole ordeal did not take more than 45 minutes and the flavours were bold and satisfying! Another pinterest success in my book!
Monday, January 23, 2012
Peels
This weekend winter finally got to NYC! On Saturday morning we woke up to a couple inches of snow on the ground and lots more still coming down. In true southern fashion my room-mates and I were all so excited to see snow we were up and at em before 9:00 am- on a SATURDAY! So naturally by 10 we were ready to venture out! We pulled on 27 layers of clothes, hats, gloves,our snow boots and hit the road! Since we struck out so early we decided to try our luck getting into Peels. This is a super charming and delicious spot in the east village, and their brunch is phenomenal!

We were seated at a table upstairs and quickly shed about 15 layers and settled into our table. Peels is super cosy, and even though it was early there was already a substantial crowd. My cohorts ordered coffee so I decided to indulge in a cup of hot chocolate. Best decision ever!! This was possibly the best hot chocolate I have ever had! It was super rich and topped with a home-made marshmallow, YUM!


We all drooled over the menu for a good 15 minutes before we could make a decision. Everything looked so good it was almost impossible to choose. We did have to start off by sharing an order of the Parker house rolls. They were served with home-made butter and raspberry jam. These rolls were out of this world good. They had a crunchy-flaky crust but were light and airy on the inside. Thank goodness they only brought us 2 in the order because I am sure we could have eaten 12! I also did not get a picture until after we had gotten into these a little bit- but I figured this just proves how good they were!

So we all went with pretty traditional brunch food- but the menu had a wonderful array of breakfast and lunch items. The crispy chicken sandwich comes highly recommended so I promise to try that next time(They serve only free range chicken here which is a huge plus!) I decided to go with quiche which is fresh daily and this past Saturday's was a leek, Gruyère and mushroom concoction. It was fantastic. It came with a simple green salad and side of bacon- I could not have been happier with my order. It was warm and hearty, but not over the top filling! My dining buddies had the omelet and the biscuits and gravy which both got rave reviews.


We all enjoyed our meals very much, and also enjoyed the ambiance at peels. There is a large display counter downstairs that showcases all of the pastry and sweets. There is lots of natural wood, and I love any restaurant that has a few long picnic tables for group dining! It was the perfect place to spend a snowy Saturday morning. Just the right amount of hustle and bustle companied with a very laid back attitude towards dining. We were never rushed but the servers were very attentive! I also really loved the décor. There was a very country comes to the city feel!

Peels did not disappoint at all and I think it will for sure become one of our fav brunch spots. The line was almost out the door by the time we left, but its just that good, people will stand out in the snow waiting for a spot at one of these tables!
Peels:
And just so everyone can have a good laugh to start off their week- Here is a picture of Herman LOVING playing in the snow this weekend! Hope everyone has a great week!

Friday, January 20, 2012
Birthday Dips
Well the restaurant review I promised on Tuesday is going to have to wait. I have had a major technology fail this week and all of my pictures for that post are MIA- but I will find them and put it up this weekend! In lieu of that post I am going to put up a couple of recipes for dips that I made for a birthday dinner this week!
On Wednesday night we had a super fun girls dinner to celebrate Grace's birthday! I offered to bring an appetizer. Bringing food to a party in NYC poses a couple of issues. It needs to be able to travel(either cab or subway) and for me- making anything to fancy during the week for a party is tough as I have to be able to get it done after work and before the gathering(which is usually a 45 minute window).
So I decided to bust out my new food processor and make home-made hummus and a creamy pesto dip. This way there is a little variety- these flavours are a good preface to almost any meal(I did not know what the main course was going to be) and the bonus- it travels well! I was able to make the dips the night before, so major points for convenience!

Ingredients:
1 Can Garbanzo Beans
1 Clove crushed garlic(I sautéed mine in olive oil to give the flavour a little more depth)
2 tsp ground cumin
1 Tbsp olive oil
2 Tbsp fresh squeezed lemon juice
1 tsp black pepper
Directions:
-Drain garbanzo beans over a bowl and save the liquid
-add ALL ingredients to food processor and blend.
-Once thoroughly combined begin adding liquid until desired consistency is reached
-Refrigerate overnight
*I also would have added 1/3 cup of tahini to this recipe- but the grocery store was out when I went shopping- but regardless this hummus was still super tasty!

Ingredients:
1/2 cup sour cream
1/2 mayonnaise
1/3 cup pesto
2 Tbsp thinly sliced green onion
2 tsp lemon juice
Directions:
-Combine all ingredients in a bowl and mix thoroughly- Refrigerate over night!

Obviously both of these recipes are pretty easy- but they are both very tasty! I have to say that the "home-made" hummus for sure beats the ones you can buy at the grocery, it taste so much fresher- you could also adjust the flavour to your personal liking! I made a double recipe of each of these and barely had any left over! I served them with some Stacy's pita chips, sliced green and red peppers, and carrots. These are great recipes for tailgate food- and good things to have in the refrigerator on a weekend when you have house guests!
On Wednesday night we had a super fun girls dinner to celebrate Grace's birthday! I offered to bring an appetizer. Bringing food to a party in NYC poses a couple of issues. It needs to be able to travel(either cab or subway) and for me- making anything to fancy during the week for a party is tough as I have to be able to get it done after work and before the gathering(which is usually a 45 minute window).
So I decided to bust out my new food processor and make home-made hummus and a creamy pesto dip. This way there is a little variety- these flavours are a good preface to almost any meal(I did not know what the main course was going to be) and the bonus- it travels well! I was able to make the dips the night before, so major points for convenience!
Lemon Garlic Hummus

Ingredients:
1 Can Garbanzo Beans
1 Clove crushed garlic(I sautéed mine in olive oil to give the flavour a little more depth)
2 tsp ground cumin
1 Tbsp olive oil
2 Tbsp fresh squeezed lemon juice
1 tsp black pepper
Directions:
-Drain garbanzo beans over a bowl and save the liquid
-add ALL ingredients to food processor and blend.
-Once thoroughly combined begin adding liquid until desired consistency is reached
-Refrigerate overnight
*I also would have added 1/3 cup of tahini to this recipe- but the grocery store was out when I went shopping- but regardless this hummus was still super tasty!
Creamy Pesto Dip

Ingredients:
1/2 cup sour cream
1/2 mayonnaise
1/3 cup pesto
2 Tbsp thinly sliced green onion
2 tsp lemon juice
Directions:
-Combine all ingredients in a bowl and mix thoroughly- Refrigerate over night!

Obviously both of these recipes are pretty easy- but they are both very tasty! I have to say that the "home-made" hummus for sure beats the ones you can buy at the grocery, it taste so much fresher- you could also adjust the flavour to your personal liking! I made a double recipe of each of these and barely had any left over! I served them with some Stacy's pita chips, sliced green and red peppers, and carrots. These are great recipes for tailgate food- and good things to have in the refrigerator on a weekend when you have house guests!
Tuesday, January 17, 2012
Pinterest Tuesday: Hot and Sweet Shrimp
I will preface this post with an admission. First blogger fail of the year, I did not properly document this dish, the pics I did get are kind of cruddy and do not do justice to its scrumptiousness. Alas, I am going to give this a write up anyways! So if any of y'all decide to make this and get better pics please let me know!! If you are a fellow pinterest nut you can view the recipe I based this off of here.


I will say it one more time, the pictures do not do this justice. It was so yummy! It is also great that you can make the marinade and sauce ahead of time, so this meal can be ready SUPER fast if you prep a day ahead! While it was only about 20 degrees the night I made this, it is the perfect summertime beach recipe and like I mentioned above, throwing these on some skewers on the BBQ would be divine. Hope everyone had a great long weekend and check back later this week for some more great recipes and a review of Imperial No. Nine- the Soho version of dinner in wonderland!
Hot and Sweet Shrimp
Ingredients:
2-2 1/2 lbs peeled and cleaned(but not cooked) shrimp
Marinade (it is best if this can marinate for 24, but overnight will do just fine!)
1 Tbsp. Minced Garlic
1/4 freshly pressed ginger
1/4 hot chili paste
1/2 cup sweet chili paste
1 cup honey
1 cup fresh squeezed lime juice
1/2 tsp salt
1 tsp fresh ground pepper
1cup canola oil
Sauce:
3/4 cup vegetable oil
1 cup sweet thai chili sauce
2 Tbsp sesame seeds
1/4 cup lime juice
1/2 cup honey
salt and pepper
Directions:
-Mix all sauce ingredients thoroughly and let sit for at least 30 minutes
-Heat a large skillet over medium heat(if you have access to a grill, grilling the shrimp would be awesome)
-Pour contents of the marination bag into the heated skillet and cook until shrimp are opaque(this will only take about 4-6 minutes)
-Once shrimp are cooked pour off excess cooking liquid and move shrimp onto serving dish(if you leave them in the skillet they will overcook)
-Pour the sauce over the shrimp and mix- or you can set the sauce on the side and let people sauce them to their own personal liking


Thursday, January 12, 2012
A New Turn in the South
This post is going to be short and sweet, as I am in LA for work and only have about 12 minutes in between meetings- but I did promise to blog more, and I will not fail myself this early on in my resolution! Hugh Acheson is amazing. I do not just like him because I am from Athens, or because I love him on top chef- his new cookbook A New Turn in the South is sure to solidify his spot in culinary history. It is a BEAUTIFUL cookbook filled with awesome recipes and anecdotes.

So if you have a Amazon gift card left over from the holidays put it to good use and go buy this book! The writing and photography are exquisite! If for no other reason, purchase this just to have Hugh's pimento cheese recipe, his is the only pimento cheese I have ever had that rivals my Moms!!

Tuesday, January 10, 2012
2012-Year of the Blog
One of my many resolutions in 2012 is to dedicate more time to this blog. Having all of these recipes and restaurant reviews in one concise place is going to useful down the line, and I want to spend time making sure I have a thorough on-line anthology.
So to kick off the 2012 I am going to detail a recipe I got off of Pinterest- thus the return of Pinterest Tuesday! This recipe is not very diet friendly for all of us that are a health kick in 2012- but it is perfect for birthdays and various celebrations, and all health bets are off at those types of gatherings right?

Two words fully explain these little bites of heaven. EASY and AWESOME. I did not even have to go to the real grocery store to get the ingredients, I was able to get everything I needed at Trader Joes.
Ingredients:
(Batter)
-1/2 cup unsalted butter, softened
-1/2 cup white sugar
-1 1/2 cups white flour
-1 cup yellow cake mix
- 1 teaspoon vanilla
-1/8 teaspoon salt
-3-4 tablespoons milk
-2 tbs sprinkles
(Icing)
- 16 ounces almond bark or white candy melts
- 4 tbsp yellow cake mix
- sprinkles
Directions:
-Beat together butter and sugar using an electric mixer until combined
-Blend in vanilla
-Add cake mix, flour, salt, and vanilla and mix thoroughly
-Add 3 Tablespoons of milk or more if needed to make a dough consistency. Mix in sprinkles by hand.
-Roll dough into one inch balls and place on a parchment or wax paper lined cookie sheet. Chill balls in the refrigerator for 15 minutes to firm up
-While dough balls are chilling, melt almond bark in the microwave in 30 second intervals until melted-stir between intervals
-Once melted, quickly stir in cake mix until incorporated completely
-Using a fork, dip cake balls into icing and shake of excess bark by tapping the bottom of the fork on the side of your bowl, place back on the cookie sheet and top with sprinkles.


This recipe was really fun and easy to make- the best part is you could easily adjust this recipe to your taste or the occasion. You could make coloured dough or icing by adding food colouring which would make this fun for any and all holidays. You can also adjust the flavour profile by adjusting the type of cake mix and icing used! Next time I think I will make chocolate cake balls with some salted caramel icing(YUM!) This is also a fun recipe to make with younger kids, as it is super easy there are plenty of jobs they can do on their own- it is also almost instant gratification which works well with younger chefs!!
I am looking forward to 2012 and many more restaurants and recipes to come! Check back Thursday for a restaurant shout-out and cook book recap!
So to kick off the 2012 I am going to detail a recipe I got off of Pinterest- thus the return of Pinterest Tuesday! This recipe is not very diet friendly for all of us that are a health kick in 2012- but it is perfect for birthdays and various celebrations, and all health bets are off at those types of gatherings right?
NO BAKE CAKE BALLS

Ingredients:
(Batter)
-1/2 cup unsalted butter, softened
-1/2 cup white sugar
-1 1/2 cups white flour
-1 cup yellow cake mix
- 1 teaspoon vanilla
-1/8 teaspoon salt
-3-4 tablespoons milk
-2 tbs sprinkles
(Icing)
- 16 ounces almond bark or white candy melts
- 4 tbsp yellow cake mix
- sprinkles
Directions:
-Beat together butter and sugar using an electric mixer until combined
-Blend in vanilla
-Add cake mix, flour, salt, and vanilla and mix thoroughly
-Add 3 Tablespoons of milk or more if needed to make a dough consistency. Mix in sprinkles by hand.
-Roll dough into one inch balls and place on a parchment or wax paper lined cookie sheet. Chill balls in the refrigerator for 15 minutes to firm up
-While dough balls are chilling, melt almond bark in the microwave in 30 second intervals until melted-stir between intervals
-Once melted, quickly stir in cake mix until incorporated completely
-Using a fork, dip cake balls into icing and shake of excess bark by tapping the bottom of the fork on the side of your bowl, place back on the cookie sheet and top with sprinkles.
-Chill cake balls in the refrigerator until serving.
Here is a picture montage of the whole process:


This recipe was really fun and easy to make- the best part is you could easily adjust this recipe to your taste or the occasion. You could make coloured dough or icing by adding food colouring which would make this fun for any and all holidays. You can also adjust the flavour profile by adjusting the type of cake mix and icing used! Next time I think I will make chocolate cake balls with some salted caramel icing(YUM!) This is also a fun recipe to make with younger kids, as it is super easy there are plenty of jobs they can do on their own- it is also almost instant gratification which works well with younger chefs!!
I am looking forward to 2012 and many more restaurants and recipes to come! Check back Thursday for a restaurant shout-out and cook book recap!
Subscribe to:
Comments (Atom)